Monday, 30 November 2015

The Illusionist

Shaftesbury Theatre
Today I arrived in London, it is the first time I have visited the city.
The Illusionist is playing at The Shaftesbury Theatre, I went to watch it and for anyone with a love of magic (like me), this is perfect for you. There was a variety of different tricks and jokes that had me and everyone else laughing. It was not just magic though, there was also some dancing in between the scenes.  
The women dancer's costumes consisted of a modernised  corset and bustle/skirt decorated with glitter that sparkled when the light hit it. They looked really good on stage and matched the dramatic atmosphere of the production fantastically.

The show consists of amazingly talented illusionist; The Trickster, The Magician, The Escapologist, The Inventor, The Deductions,  The Warrior and The Manipulator.
I loved this production and I would highly recommend it to anyone, of any age.

Visit their website at:
The Illusionists
The Illusionist- Paper Plane

Thursday, 26 November 2015

Knit and Stitch Exhibition

At the Knit and Stitch it was really enjoyable to have a look at all the different fabrics and trimming that are available and I got a good collection of buisness cards and leaflet that I can use in the future. I also got a lot of inspiration from the crafts that were on show. There was graduate work being displayed so it was interesting  to have a look at what some graduate are producing.
Visit their website at:

Thursday, 19 November 2015

Corset Making

Corset Construction
For my Cut and Construction module I will be making a corset and a bustle. I have started to pin and cut out from my main fabric and Coutil. The pattern I am using is a Victorian Corset from a Janet Arnold book and I had to size it up so that it fit my model. The fabric I am using is a brocade from www.fabricuk.com. This website also gives the option to order a matching coloured thread. 
Corset Construction
Remember to always order a sample first when ordering online. The fabric colour doesn't always look like the picture and the quality and sheen might be different then expected.
I have already made a toile, fitted it and adjusted the pattern accordingly. When measuring for my boning I measured the length of my seams on my toile and then minus it by 4 (the size of my seam allowance 2cm at the top and 2 at the bottom). To measure for the busk, I measured the front of the toile when the model is sitting down.
I order my boning and busk from Sew Curvy www.sewcurvy.com.


Thursday, 12 November 2015

Pride and Prejudice

I have recently watched Pride and Prejudices made in 2005. The costumes for this production were designed by Jaqueline Durran and are inspired by clothing in 1790 due to the directors vision.

I did some research into the costumes and according to the website Costumers Guides the waistline are lower than the empire waistline to due the period it is being set. They are also differences in the main characters costumes to portray ideas about them such as earth colours being used on Elizabeth Bennets costumes to portray her love of countryside and how Caroline Bingley's costumes have a empire waistline to show that she is very fashionable and of a upper class status.
I especially like this costume because of the strap of colour that has been added to the a white dress. The pleating used creates a really nice decorative effect and really aids in making a elegant silhouette.

Resources: Costumers Guide. http://www.costumersguide.com/pride_prejudice/2005.html (12.11.2015)

Thursday, 5 November 2015

Digital Design

For the next four weeks I will be doing digital design sessions. In these I will be learning how to uses to Photoshop and Illustrator in my designs.
Maria- Glorious!
In the first session we learn how to create line drawing on Photoshop and how to uses the magic wand tool to select the areas you want to colour. The burn tool or dodge tool can then be used to add dark or light to the designs making them look more three dimensional.
A really great tip when using Photoshop is to add different layers, don't add to the background layer since the options are limited on this layer. By creating layers you can remove section that you dislike easily without ruining other parts of the design.
You can take your designs and scan them into the computer, open them in Photoshop and using the magic wand tool you can select the lines from the drawing. The design that is scanned in needs to have really good lines and any breaks in them will cause the colour to leak out. This line can then be darkened using fill.
Cut this line and then paste it in another layer, change the background to a solid colour commonly white. Create another layer and start adding colour. By changing the colour saturation and hue you can easily view your designs in different colours.
Patterns and fabric can also be scanned and added into the designs and wrapped around the design to make it look three dimensional.
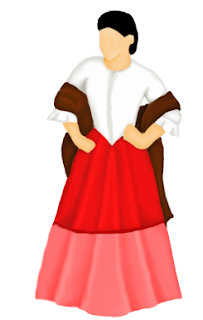
Here is my design for Maria for Act 2 Scene 3 of Glorious! by Peter Quilter. This was made using Photoshop.